Utilizing the SDXL Base Checkpoint in ComfyUI
- Integration with ComfyUI: The SDXL base checkpoint seamlessly integrates with ComfyUI just like any other conventional checkpoint.
- Optimal Resolution Settings: To extract the best performance from the SDXL base checkpoint, set the resolution to 1024×1024. If you wish to use a different aspect ratio while retaining the same pixel count, alternative resolutions such as 896×1152 or 1536×640 are also viable.
- Refinement Workflow:
- If you’re aiming to employ the SDXL base in tandem with the refiner, there’s a specific workflow for this purpose.
- To initiate, download the recommended image. Subsequently, you have two options: a. Load the image directly into ComfyUI. b. Simply drag and drop the image onto the ComfyUI interface.

You can also give the base and refiners different prompts like on this workflow.

Utilizing ReVision within ComfyUI:
Introduction to ReVision: ReVision functions in a manner reminiscent of unCLIP, yet operates on a more abstract plane. It empowers users to feed one or multiple images, from which ReVision extracts conceptual elements and uses them as muse for crafting new images.
Setup:
- Download CLIP-G Vision: Begin by procuring the CLIP-G Vision model.
- Model Placement: Once downloaded, move CLIP-G Vision to the designated directory:
ComfyUI/models/clip_vision/.
Workflow Integration:
- Loading Workflow into ComfyUI: A sample workflow has been provided to showcase ReVision’s capabilities within ComfyUI. You can integrate this workflow into ComfyUI in two simple steps:
- Drag and drop the example workflow directly onto the ComfyUI platform.
- Alternatively, use the loading function within ComfyUI to manually locate and open the workflow.
- Optimizing Output Fidelity: In the provided example, the positive text prompt has been nullified. This strategy ensures that the ensuing image remains true to the conceptual foundation of the input image, without diverting excessively.
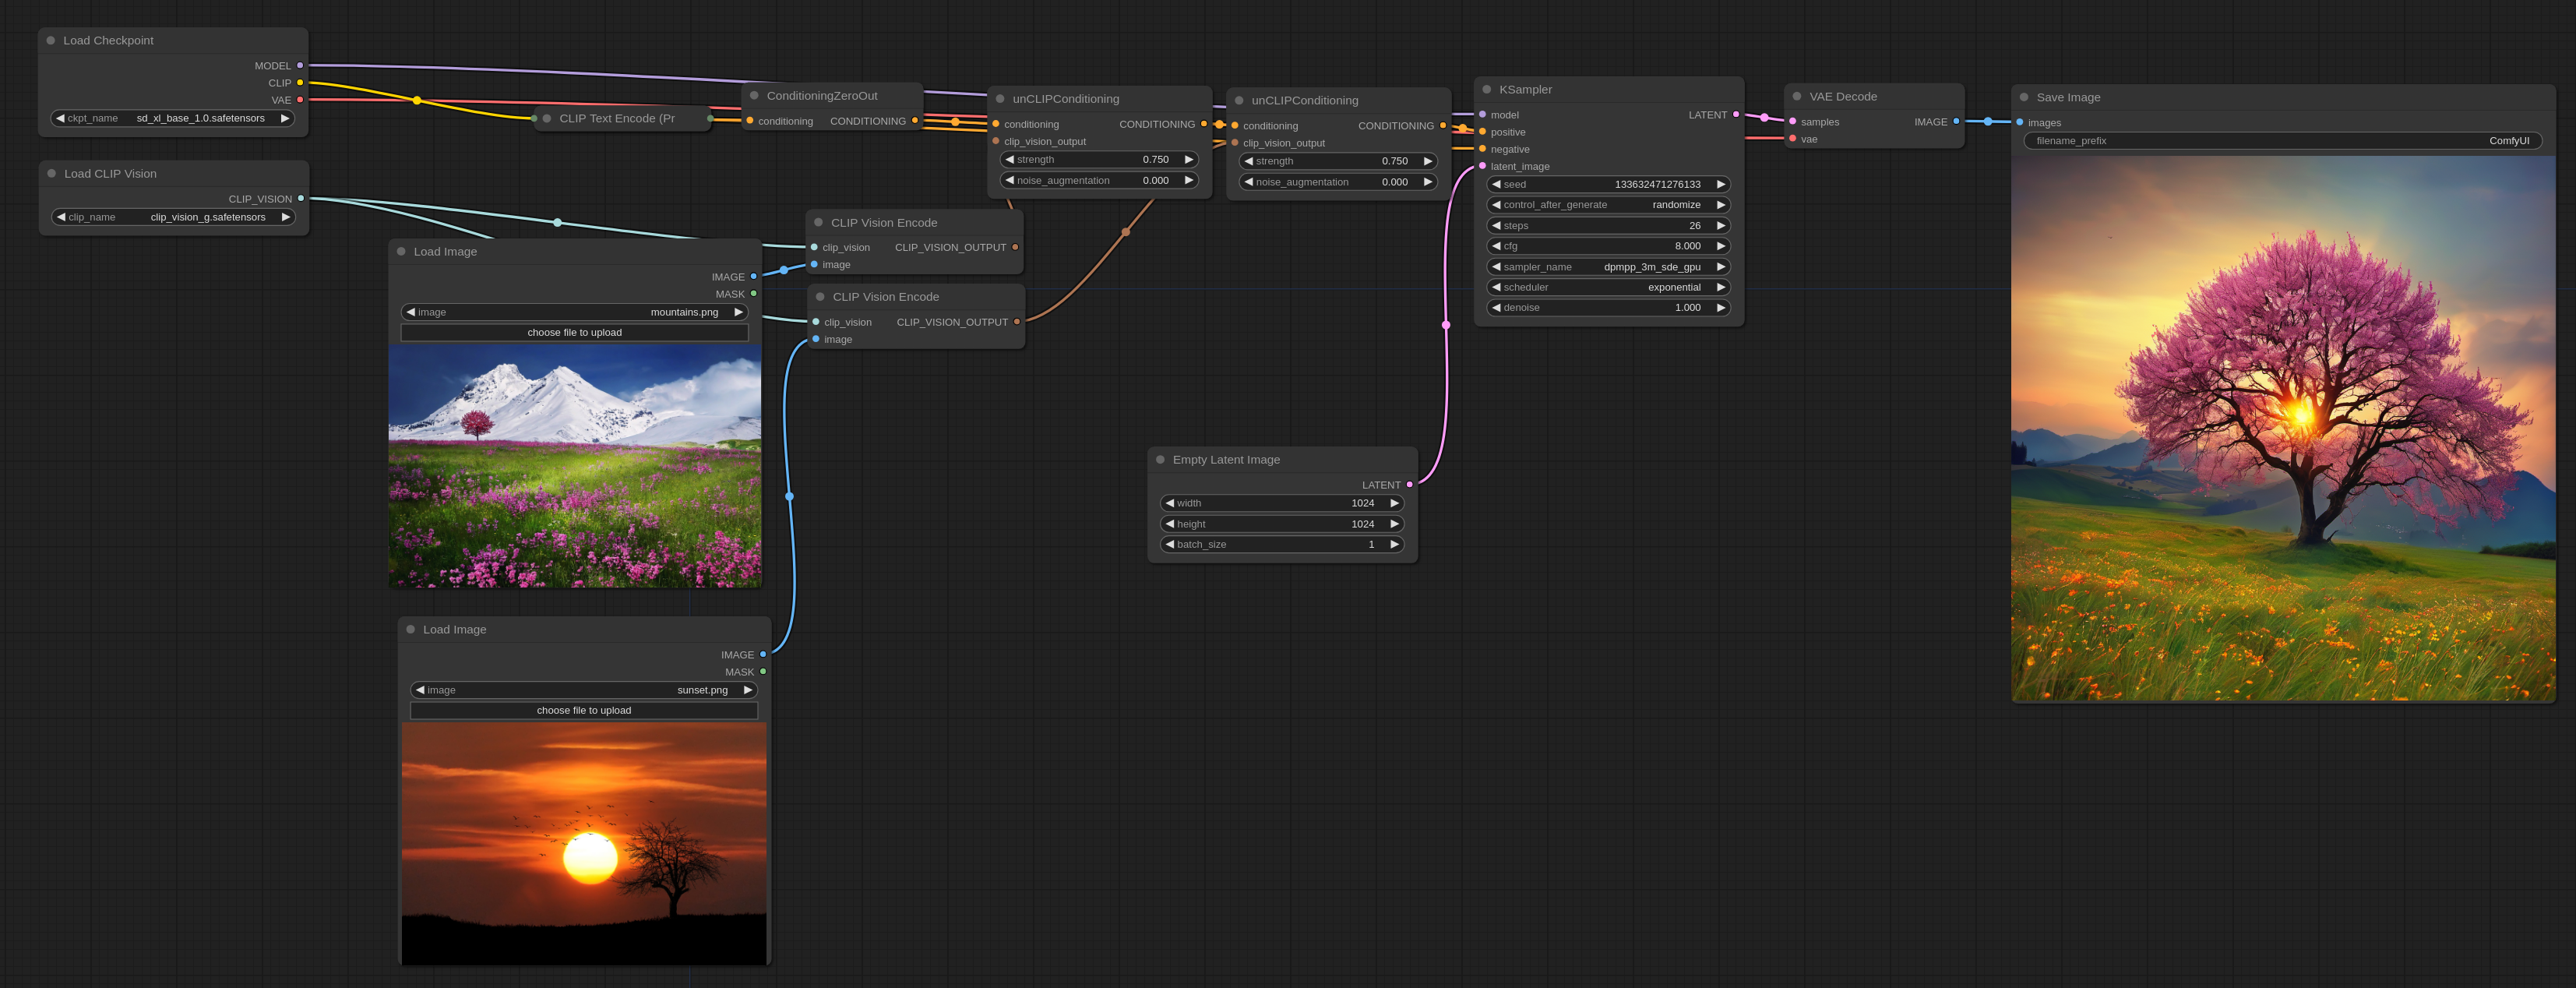
If you want to use text prompts you can use this example:

Note that the strength option can be used to increase the effect each input image has on the final output. It also works with an arbitrary number of images by either using a single unCLIPConditioning or chainning more than one together like in the above examples.
Here are the input images for the above workflows if you need them:

